Showing posts with label Face. Show all posts

Wednesday, November 11, 2015

5 products I absolutely cannot live without or my beauty regiment will be disrupted and my life will be over!!!!!

HELLO! Sorry that we've been away for quite a while, it's the work and mundane things we have to do as humans to survive ): Anyway, onto the topic today, 5 products that I cannot live without, okay actually, more like 5 most useful beauty products. Let's get started!

1. Currently this is my no.1 go to for an every day touch of lip colour. A while ago, we did a tutorial on Korean ombre lips, lips that give you the petal- bitten gradient effect (wow). But personally, being a super lazy person by nature, I can never find the effort in me to apply foundation on my lips first then tint to achieve this look. I mean, who has lots of time nowadays?! And also, being a foodie, when I eat, I really don't want to taste foundation in my mouth. Luckily, for me and for those of you who are like me or for some reason can't do it, a Korean brand - VDL cosmetics, has come up with a solution! It is called the Triple Shot Tint Bar!


If I'm not mistaken, they come in four colours, Triple Pink, Triple Red, Triple Peach and Triple Burgundy (an even darker shade of red). I use the triple pink! Each tube looks like this:


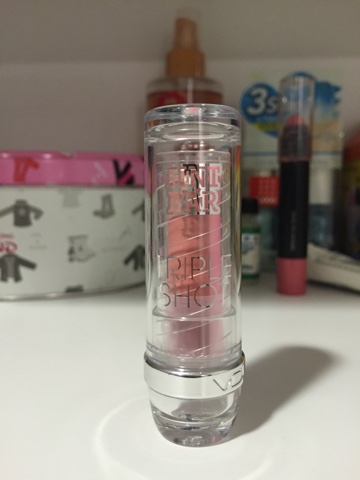
The interesting part is when I open the tube: 

When applying to your lower lip, the brown part should be at the bottom with the brightest pink at the top then flipping it the other way when applying on the top lip. Applying it this way, horizontally, will give you a pretty ombre lip in just one smooth slide!


This product, is more of a lip balm than a lipstick, pretty moisturising but not SUPER moisturising, staying power is not that good though, but I mean, after all it is still a lip balm.

You can get yours right here: 
http://list.qoo10.sg/ad?keyword=VDL%20tint%20bar%20triple%20shot&jaehuid=2000145206

2. Okay this is my second in command for lips, especially when I go out for important events where you have to dress prim and proper. Personally, I don't usually like applying lipstick but ever since I found this one, I've wanted to apply it on my lips every single day, even on the days that I spend at home, because of how it feels on my lips. The product I'm talking about is the Rubi Lip Crayon:

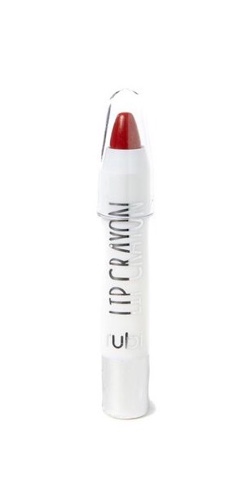
I find that most people don't pay much attention to the makeup brands that come from brands that are mostly well known for their clothings. This lipstick was an impulse buy but it's probably one of the best impulse buys I've ever made. The application is extremely smooth (oooohlalaaaa), it glides like a swan, not matte but not too glossy or shiny either.


The only negative thing about this lipstick is that it stains things really easily like with all other red lipsticks but other than this, I have absolutely no complains at all.

3. A couple of posts back, we sweared on an acne solving product called acne clear, today, another product I swear on is the Etude House - AC Clinic Intense Pink Powder Spot.


These three things come in a set, which means they even give you the cotton buds. When you have a horrible pimple that you want to get rid of, what you do is dip the cotton bud straight into the bottle on the left (for nighttime use) and the cotton bud will come up pink because there's pink powder that settles at the bottom of the bottle in the liquid. Then, apply the product right on your pimple, the pink powder will settle and dry up on your skin, I swear that on following day or in two-three days, your pimple will BE GONE. LIKE MAGIC. The one on the right is for daytime usage, instead of a pink power settling on your face, it's more of a sheer covering that you can cover up with makeup and go about your normal day!

4. Skin Food's Black Sugar Mask


I know you can't see from the picture but the texture of it is gritty with exfoliating properties. The grits are really sugar (I've accidentally tasted them)!! This product reminds me of the exfoliating product for your lips to scrub off dead skin, this Black Sugar Mask does the same except that it's for the face. I usually use this product when I have an acne breakout, the sugar bits might be too harsh at first but the more water you mix with the product, the more the granules will dissolve, the oils in this also ensures that your skin doesn't dry out. Immediately after rinsing off, the first noticible thing is that the texture of my skin has amazingly become baby bottom soft and silky smooth. I'm not even exaggerating. Okay, maybe a bit. But it's really phenomenal. No joke.

5. Lastly, every good house has a good foundation and my face is covered with my trusty BB cream: IOPE Air Cushion XP


Usually in Singapore when we say BB Cushion, we think of the Laneige brand. But for me, IOPE Air Cushion XP gives a really nice dewy and glowing radiance that most k-actors have. It is hydrating without being cakey and is light and cooling. However, this BB cream, like most products, has its flaws, after a while in this tropical heat and humidity, blemishes will start to show minimally. Although the I would like for it to have full coverage, it sadly only has medium. I think this BB cream would be a winner for those with normal to dry skin.


Okay! That's all for today! Thanks so much for reading and good luck!

- Audrey!

Tuesday, April 21, 2015

Kinohitmitsu BB Drink : Bird's Nest with Acerola Cherry

Hello everyone, how's your weekend? The weather for these past few months have been pretty wacky isn't it? One minute it is drizzling, the next minute it is blazing hot.
Because of this, some of us would have outbreaks on our faces, which is very frustrating.

However, I have found a temporary solution to reduce the acne and achieve a radiant glow in a week.


image

I was with my friend at Watsons, when we decided to try this out as it seems pretty promising, and I never regret it ever since. I religiously drank it every morning for a week and I was pretty amazed with the result for just a short period of time.

Let's see the result.....


                                                    Before                         After

Sorry for the gross pic :X   , but as you can see from the before and after picture. My skin is definitely less oily, more radiant and the "big acne" as seen on the cheek area has subside by a lot.

The ingredients in this product are as followed:

Hydrolysed Bird’s Nest is a Japan-patented ingredient (Patent No.: JP2003-095961; JP2005-206547; JP2002-068988). Bird’s Nest is rich in Epidermal Growth Factor (EGF), sialic acid (200 times higher than royal jelly), amino acids and minerals which are essential to promote skin cell regeneration, enhance skin healing and promote youthful-looking skin. It is produced via an enzymatic process at a small molecule size for effective and optimum absorption without using any chemicals and bleaching agents.
 
Chicken Cartilage (a source of hyaluronic acid, HA) keeps skin hydrated. Well-moisturised skin is radiant. HA functions as a sponge. It is located in the inner skin to attract and bind water within the cells and tissues and prevent the skin from drying out. HA also helps to maintain the balance of water and oil in the skin, helping skin to look smoother and more hydrated.
 
Fermented Yeast (a source of CoQ10) functions to replenish the depleted CoQ10 level in our body where CoQ10 has the ability to increase collagen and elastin production in the skin and promote skin cell turnover. It also helps to re-activate other antioxidants e.g. vitamin C and E that are crucial to healthy, glowing skin.
 
Acerola Cherry has 32 times greater amount of Vitamin C than in oranges. It also contains mineral salts (iron & calcium) that aid in the re-mineralisation of tired and stressed skin.
 
Rice Bran Ceramide has a moisture-locking effect that helps soothe acne and reduce skin inflammation

I would definitely recommend this product , however it costs about $6.65 / *$3.99 per bottle, which means you will spend $46.55 / *$27.93 for a week.
* Prices in red are the offered prices as seen in Watsons. Watsons occasionally offer these prices which is definitely worth the wait if you are planning to purchase more than 1 box of this. I recommend you to wait for the offer and get a friend to share with you as you can mix with other kinohitmitsu drinks.

Therefore, if you have an event coming up and you are looking for a temporary solution to clear your acne asap, this is the right product for you.
This can be a long term solution too, but it will burn a hole in your pocket!!

I will recommend to take this for 1.5 month then stop. Monitor your skin condition, until there is small breakout again, then buy it again to drink it. This way, it will ease your burden on your wallet :)

To consume it, drink this consecutively for 6 days, followed by 1 bottle every 3 days for maintenance.

Do let me know if you have purchased this, and how's the effect on you ?

Sunday, September 7, 2014

BLACKBOX

I am actually kind of surprise to receive this month's blackbox in my mailbox as its been really quite awhile since I last receive this. I am sure some of you have subscribed to the blackbox and realized that they have changed their system to a balloting system.
Ever since then, my balloting always fail to get through. Therefore, I am pleasantly surprised to receive this month's blackbox. So, let's proceed on to see what is in it.


So on the front of the blackbox, or should I say black "envelope" ..haha, it states that they are planning a surprise in the coming months and they are working extremely hard on it...I wonder what are they planning, I shall wait and hang on for the surprise!


1. Hada Labo SHA Hydrating Lotion
This lotion helps to improve dry and dehydrated skin, leaving it silky smooth. I am not sure whether to try out this product again as my skin became did not improve at all despite all the good reviews on this series. I am afraid it is not suitable for all skin type.


2. L'Oreal Paris Hair Expertise EverSleek Shampoo and Conditioner
Wow, such a generous sample portion size. I am very happy to receive this as my hair is frizzy and unruly. So I am hoping L'Oreal shampoo and conditioner can save my dying hair!!


3. Dettol Skincare Body Wash
Dettol new and improved body wash. Shall see if my skin can really stay moisturized and healthy after using this


4.  Different Types of wipes
I have actually receive zappy antiseptic wipes in all the blackboxes I have received. To me, I am not particular in the type of wipes I used.
Besides the antiseptic wipes, I have also received a stain remover, shoe and leather polish wipes. I shall keep these in my bag as these might come useful in unexpected events.

 
5. Klarity Lasertox V-Line Slim Up Mask
I leave the best for last, which is this product!! I am so so happy to receive this. Having to achieve a V-Line face is a dream for me. I can't wait to try this out :D . I shall review on this mask soon and see if it works. Keeping my finger cross.


Wednesday, August 13, 2014

MAC Prep+ Prime Natural Radiance

Hey babes, how has your week been so far? Only 2 more days to go before the weekend :)

So last month I celebrated my 26th birthday at Maldives and it was excellent ( I will post an entry on that trip, so do stay tune for it). I am sure most of you know that one way to get your cosmetics at a cheaper price would be patronizing the duty free shop at the airport. Therefore on my way to Maldives, I purchased a few items at MAC. One of the item I have purchased was the MAC Prep + Prime Natural Radiance.


Face Primer
 
Description of the item:
A silky gel emulsion, rich in natural ingredients, that hydrates and primes to improve foundation or powder application, control oil and promote smooth texture. Vitamins E and C protect with antioxidants, while caffeine calms skin. Illuminating pearl powders reflect optic brightening. Now in two shades; Radiant yellow especially effective on deeper skin tones and Radiant Pink for fairer skin tones. The formula disappears upon application, resulting in a beautiful glow.


The face primer comes in 2 shades, and I purchased the primer in radiant yellow shade. I am quite pleased with this item as I notice that my foundation and powder application were much smoother.

I am sure some of us have experience acne appearing on our faces the following day after applying liquid/ powder foundation without a face primer .This happens as the foundation does not have the ability to control oil.
Therefore I strongly recommend this primer as it does not clog up my pores . It really does control the oil on my face which prevent acne from popping up the next day :)


This is how the primer looks like. One tiny drop from the bottle is enough to cover the whole face. There is a slight scent from the primer but not to worry as the scent will fade away after a few minutes. Now lets see how the surface of my hand looks like after applying the primer.


There is a slight glow on the skin surface to create the illusion of a radiant skin. Also, the brightening effect can be seen due to the illuminating pearl powder. The only part I didn't like about this product was there is a slight greasy feel to it right after application as it is a gel emulsion.  Overall, the product deliver its purpose.


Thursday, June 12, 2014

How to choose the right shade of red for your lips


How to choose the right shade of red for your lips?


Red lips give you a more striking look and super BOLD look if you want to stand out in the crowd or simply look like that fashionista walking down the street. 

All heads will whip in your direction.

But how do you know what shade of red to pick?! In a dilemma? Hope this helps (:

Amongst skin types, there are three:

- Warm undertones
- Cool undertones
- Neutral undertones 

Huh? What're they?! How do I know which one I am?!

Here's a short quiz :) take a pen and jot down your answers!

1. Look at the inside of your wrist, under natural sunlight, what colour are your veins predominantly? 

A. More blue
B. More olive/green
C. Mix of both

2. Picture yourself (or better yet, do it) in a yellow shirt or orange shirt? Which do you look best in?

A. Absolutely fabulous!
B. Yucks, I look sickly. 
C. Hmm, I could pull this off

3. Place a piece of plain white paper next to your face, how do you look in comparison?

A. Urgh gross my complexion is so bad, so dull and sallow.
B. Hmm quite nice, I don't see any like too bad shadows.
C. Oh I look okay la

4. Place something gold on your wrist, then place something silver next to it, which colour makes your skin look more wow and alive?

A. Gold gold gold
B. Silver all the wayy
C. I look good in both!

5. When you get under the sun for a tan, do you...

A. Skin turns a golden-brown
B. Burn and turn pink
C. Burn then tan

If most of your answers are...

A
Yay, like me, you fall under the category of warm undertones (: there is this misconception that pale girls cannot have warm undertones, but I mean look at Nicole Kidman, I kid you not, she has a warm undertone. And so does Jessica Alba, Jennifer Lopez and Beyoncé. Wowowow, here's the colour palette for your preferred lip colour and/or clothing colour! Warm toned people should lean towards yellows, oranges, browns, yellow-greens, ivorys and warm reds.


Lip colours such as...


B
Mmm, you have a cool undertone.
Many celebrities such as Anne Hathaway, Lucy Liu, Cameron Diaz, Scarlett Johansson (I love all of them omg).
Cool undertones should lean towards blues, greens, pinks, blue-greens, magentas, and there're this things called "blue-based" reds. Colour palette...

Lip colours such as...


C

LUCKY YOU!! You, my friend, have a neutral undertone, you can pull of BOTH warm undertone colours and cool undertone colours!!! URGH I ENVY YOU.

Well, at the end of the day, don't be restricted to your undertone! Go out and explore (: use whatever shades of red you think look good on you! Just wear a smile and you'll always look great :D remember to line your lips when wearing a red lip so that it gives you a cleaner look and a perfect Cupid's bow ♡

And so, this marks the end of our post today! Hope this helped you a lot!!!

Good luck! ☆

- Audrey

    Thursday, July 11, 2013

    Clinique 3 step skin care kit

    For the past 1.5 year, the condition of my skin has been pretty bad. i,e acne problem. It doesn't help that the weather in Singapore is humid, and also the use of BB cream for the past couple of years might play a part in it. 

    Ladies, did you know that the usage of BB cream causes the skin to be oily thus causing acne as it clogs our pores!! This is because BB cream was actually manufactured for the Koreans who have done plastic surgery to their faces which is not applicable to ours. But due to the over publicizing of BB creams in our country, we ladies will just blindly purchased these without knowing whether its suitable for our skin type.

    Ok back to the topic of my horrible skin. Recently when i was skyping with my sis, i noticed that  her skin was in a pretty good condition. So i asked her what product is she using, and she recommended Clinique 3 step skin care kit.


    Clinique

    It comes in a white pouch that makes it look sophisticated. Do purchase this at the airport as it will be much cheaper than purchasing it in their retail outlet. So lets take a look at the items inside.


    Clinique

    So step 1 would be cleansing the face with clinique liquid facial soap. According to their specialist, the liquid soap works better than the scrub. However do be prepared to pay slightly more. The texture of this liquid soap is gel based, is scent free and transparent in color. Its really mild to the skin, and gives a refreshing feel to your face. Its suitable for all skin type.


    Step 2 of the skin care routine would be applying the clarifying lotion which in common term is called a toner. I must say that this toner is pretty strong. I am not a fan of toners as my skin is rather sensitive to alcohol. However, if i do want my skin to be clear of acne ,i have to use this.  The smell of this toner has a very strong alcoholic smell to it, however the good thing about it is that it does not have a burning sensation on my skin. 


     The solution of the clarifying lotion is slightly purplish but close to transparent when i poured it onto the cotton wool.


    Look at the cotton wool after i have applied the clarifying lotion on my face. You can still see that there is still some dirt on my face even after washing my face with the liquid facial soap. Therefore, this is why toners are important in our skin care regime as it can remove the excess dirt that wasn't remove during step 1.

    Clinique

    Clinique


    Step 3 which is the last step would be using the moisturizing gel. As you can see the color of the moisturizer is yellow,it is scent free and thin in texture. When applied, the skin feels very soft and subtle. But the only thing which i do not like about this would be it is slightly oily when applied to my face. However, most moisturizers are oily in nature as it is needed to hydrate the skin.


    This 3 step skin care kit has to be used twice a day. I have been using this for a week now, and my skin has improved slightly. My acne have become smaller and less reddish. I have yet to see whether it is really effective, as i have just started using this. But i really do hope it helps! 


    Wednesday, June 26, 2013

    Gangnam Style Hyuna - Inspired Makeup Look

    Remember how viral the video of Gangnam Style went? How about the girl who danced with PSY? I am sure most of us would have a slightest impression of her.  Well, the lady in the video is called Hyuna. She is a very popular singer in Korea, and she is known for her sexiness.
    ulzzang
    Today's tutorial would be attempting on creating a look inspired by Hyuna. So let's go!


    Hyuna inspired makeup

    urban decay

    Bronze eyeshadow

    Beige Eyeshadow


    Black eyeshadow


    Fake eyelashes


    Step 1: Ensure face is cleansed properly, and apply your favourite foundation,concealer and compact powder.

    Step 2-3: Using Urban Decay eyeshadow primer, apply it around your eyelids to prevent the eyeshadow from running as seen in picture 3

    Step 4-5: Using NYX 112 eyeshadow palette, apply the bronze eyeshadow around your upper eyelid 


    Step 6-7: Next, apply the white eyeshadow just below your eyebrows to create an illusion of an "eye lift"

    Step 8-9: Using your favourite black liquid/gel/ pencil eyeliner, draw a line across the lower part of your upper eyelids and winged it downwards (yellow circles) as seen in picture 9


    Step 10-11:  Apply the black eyeshadow on your waterline,as close to your bottom lashes

    Step 12- 14:  Next, curl your eyelashes with your eyelash curler, followed by applying your favourite mascara and fake eyelashes. And you're done!


    This look is very easy to achieve, but it might take some of you ladies some practice in applying the fake eyelashes. But remember, practice makes perfect! Good luck in achieving this look!